Chat Bot Frontend Integration
This guide shows you how to integrate our AI chatbot assistant into your web application using web components. We offer multiple display modes to suit different integration needs.
Integration Options
Quick Comparison
| Mode | Description | Best For |
|---|---|---|
| Floating Button | Shows a floating button in the corner that opens the assistant | Most websites, minimal UI impact |
| Global Instance | Single chatbot instance controlled programmatically | Applications needing programmatic control open/close of the chat bot, full control of the icon. |
| Page Mode | Embeds the assistant directly within page content | Dedicated assistant pages |
| Launch Button | Button that opens the assistant panel when clicked | Specific sections needing assistant access, support multiple instances |
Integration Recipe
Download Demo from: https://github.com/bgl360/smartdocs-ai-studio/tree/main/assistant-integration-demo
After download the demo, follow the README to start the project. Once you can see the web page running on your browser, you can start follow below Recipes to quickly learn how to integrate AI Assistant into a website.
Global Instance Mode Recipe
Suitable for single instance with api control integration.
Launch Button Mode Recipe
Provided with button, support multiple instance, and put anywhere in an application.
Floating Button Mode Recipe
Positioned at the bottom right corner, suitable to use as a FAB.
Page Mode Recipe
Use as a page within an application.
OnUiAction callback Recipe
Use callback to achieve more base on your own needs
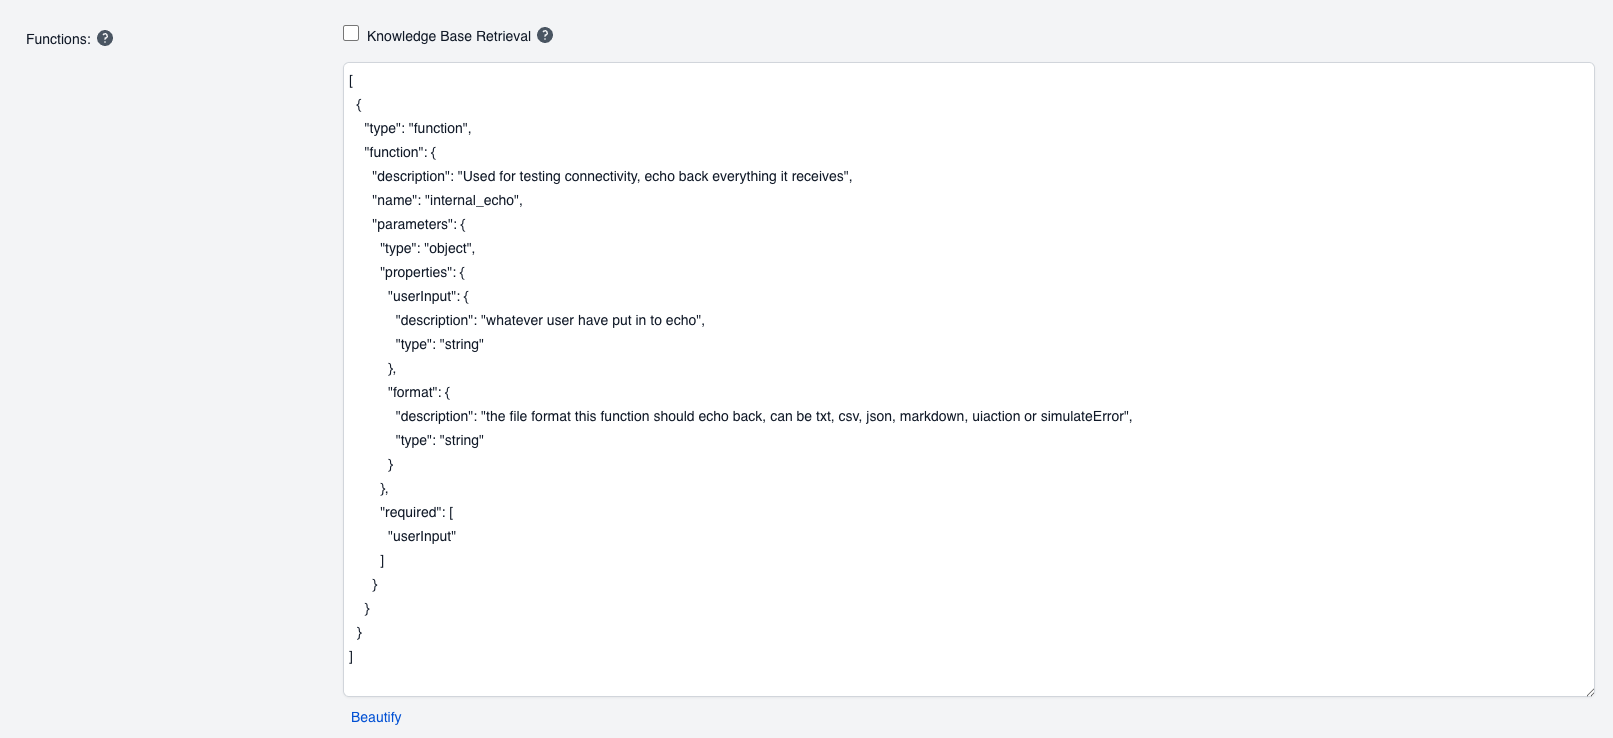
Create the assistant in ai-studio with functions such as below:
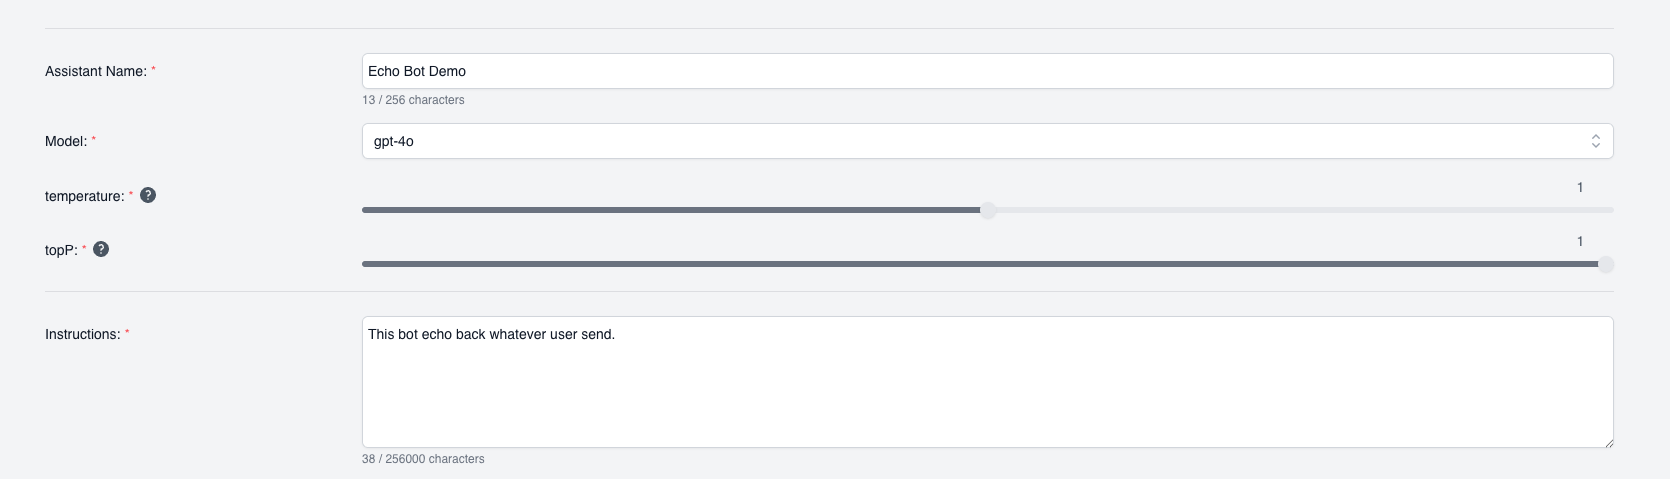
Define the function, Echo function as example below:
Follow the recipe below to check how the OnUiAction works:
Supported Parameters
The following parameters are supported (currently only string type is supported for all parameters):
show_assistants_list: Show the list of assistants in the assistant selection dropdown (optional: yes only for
ai-studio).manage_assistant: Enable the assistant edit mode (optional: yes only for ai-studio).ai_studio_business_id: Required.ai_studio_project_id: Optional, to link to a specific project for knowledge base.default_assistant_id: Required, initial assistant to load (mandatory for third-party integration).web_base_url: Required.api_key: Required if using API key authentication.firm_short_name: Required for sf360 only.entity_id: Required for sf360 only.user_id: Required.start_user_message: Optional.studio_base_url: Required for AI Studio.launch_button_color: Optional, customizes the launch button color.launch_button_width: Optional, customizes the launch button width.show_footer: Optional, shows the footer in the bottom of the chatbot (only works for page mode).simple_chat_mode: Optional, when set to "yes", displays a simplified interface without sidebar and skips some API
calls.specified_assistant_ids: Optional, specify the assistant ids to load, if provided, application will not try to
retrieve assistant list from server but instead only use provided assistants. Assistant ids should be in the format
of "asst_xxxxxxxxx", Use "," to separate multiple assistant ids.on_ui_action: Optional, accept the callback function name as string, that defined by 3rd party to handle the UI
action. This callback is triggered when functions call generated UiAction event. Once AI Assistant receives the event,
it will call this callback defined by consuming application on window level. The JSON string of the action will be
passed as param of the callback function. The consuming application should handle it's own logic based on the event
data. Example of the function:
<script>
  window.onUiActionCallback = function(param) {
    console.log('Received console log action with the param:', param)
    // define your own UI logic here
  }
</script>feedback_callback: Optional, accepts the callback function name as string, defined by 3rd party to handle user
feedback on AI Assistant responses. When a user provides feedback (Positive/Negative) on a message, this callback will
be triggered with feedback data. The consuming application should implement this function to handle and process user
feedback. Example of the function:
<script>
  window.onAssistantFeedback = function(param) {
    console.log('Received message feedback:', param);
    const feedback = JSON.parse(param);
    // Handle feedback data: feedback.messageId, feedback.feedbackType, feedback.comment
    // Process the feedback in your application
  }
</script>
Consume it as a react component
Module Federation
It is suggested to use module federation to build it as a remote component and consume it in your React application. (
Entry point: src/AiAssistantPage.tsx)
Example configuration:
pluginModuleFederation({
  name: 'ai_assistant_ui',
  exposes: {
    './AiAssistant': './src/AiAssistantPage.tsx'
  },
})
Example of using module federation to consume this component:
import { AiAssistantPage } from 'ai-assistant/AiAssistantPage';Styling
The AI Assistant component uses Shadow DOM with Tailwind CSS. You can style it from outside the component using CSS
variables or pass some style props to the component.
CSS Variables
Currently, the following CSS variables are provided for styling from the consumer side:
--content-panel-height: 90vh ; // Set the height of the content panel, default is calc(100vh - 44px)
--content-panel-zindex: 499; // Set the z-index of the content panel, default is 999
--content-panel-top: 43px; // Set the top position of the content panel, default is 43px
Add global CSS variables to your consuming HTML file
<style>
 ai-studio-chat-bot {
   --content-panel-height: 90vh;
   --content-panel-zindex: 499;
   --content-panel-top: 43px;
 }
</style>
Or add css variables directly to the web component:
<ai-studio-chat-bot
  style="--content-panel-zindex: 399; --content-panel-height: calc(100vh - 44px);"
></ai-studio-chat-bot>
Z-Index
If you are using the AI Assistant in Launch Button or Floating Button mode, you can customize the z-index of the
component using the z-index. however, if the parent of the button already have a z-index contect, the chatbot content
panel will fall into the z-index context of the parent. In this case, you need to set the z-index of the parent element
to a higher value than the chatbot content panel if needed.
Better approach is to use Global Instance mode, which will not fall into the z-index context of the parent element.
Updated about 1 year ago