How to train a custom model
Overview
SmartDocs AI Studio offers functionalities for users to train their own model if any pre-trained model doesn't fulfil the business needs.
In the current release, it supports three types of tasks with custom training:
-
Document classification:
- MultiClass-Classification: Classifying a document to a particular class/type (Water Bill/Bank Statement/Receipt etc) and this document belongs to one classification/type ONLY.
- MultiLabel-Classification: Classifying a document to two or more classes/types (both xxx and xxx etc). In this case, this document belongs to multiple classes/types.
-
Data extraction(Free Form):
- AI extracts user interested business information/data from the document automatically. Users can use either any of several pre-trained AI model(based on preselected document types) to extract data directly or train their own AI model to extract data from custom form (custom documents)
In this demo, we will show how to train a custom model with project type MultiClass-Classification so the model will learn how to identify to which type (water bill, invoice, insurance etc) the predicted document belong.
With SmartDocs Builder, user can easily train a custom model in three steps:
- Step 1: Label/Annotate Data
- Step 2: Train
- Step 3: Predict/Use
Create a new project
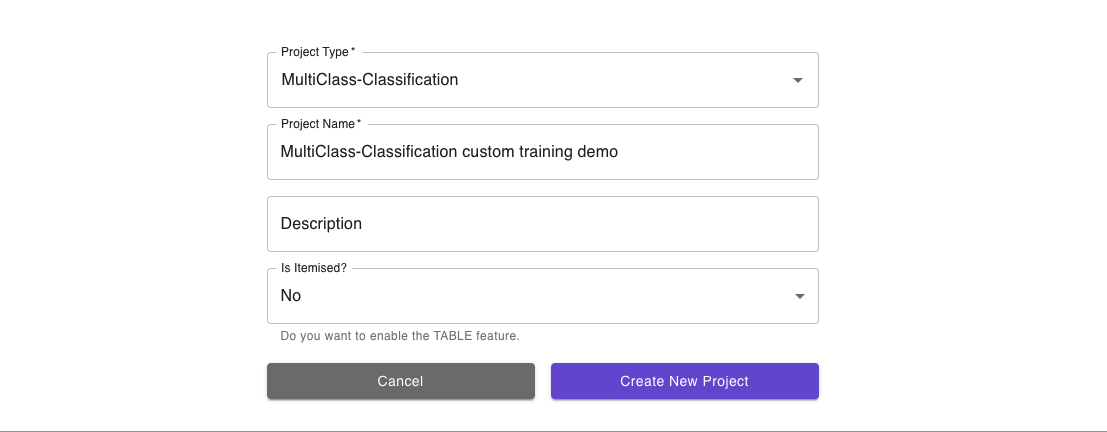
In this case, we will create a new project with project type 'MultiClass-Classification' which will train a custom model to tackle document classification task.
Firstly, click on the '+ New Project' button under the 'PROJECTS' section to create a new project and select 'MultiClass-Classification' as the project type. Both the 'Description' and 'Is Itemised' inputs are optional so we will leave them blank.
Label/Annotate Data
In order for AI to train the model, user needs to annotate data in a format that AI understands. In this case, we will demonstrate how to train a custom model for AI to identify which document belongs to water bill and insurance receipt.
Firstly, create all tags that are required to classify the documentations and user can create them via any uploaded file. In case below, we uploaded a water bill and after clicking the file you will see there is no tag created or applied.

No tag created
Click on ‘Tags’ field and type 'Water Bill' to create a new tag named 'Water Bill', you will see it listed in the TAGS afterwards.

Water Bill tag created
Repeat this process to create another tag 'Insurance Receipt' and you will also see none of tag has been applied to any document from the indicators a the right side.

Now, we have two tags created and the next step is to label the corresponding tag to the water bill document. In order to tag, firstly click on the page you would like to apply tagging. In this case, we have both the first and second page selected so it shows 'You have selected 2 pages'.
Click on the 'Tags' field and there are two tags ready for selection and please select 'Water Bill' given this is a Water Bill document.

2 pages are selected for tagging
Once it is selected, the '+ Apply Tag' button becomes green and please click the button to confirm the action. After that the indicator of Water Bill tagger shows '2' which means we have successfully tagged 'Water Bill' on the first and the second page of water bill documentation.
Remember to savePlease remember to click 'Save' button to save the tagging result.

Now, repeat the same process to upload and tag more water bill documentation (ideally from all potential service providers so AI can learn all potential water bills).
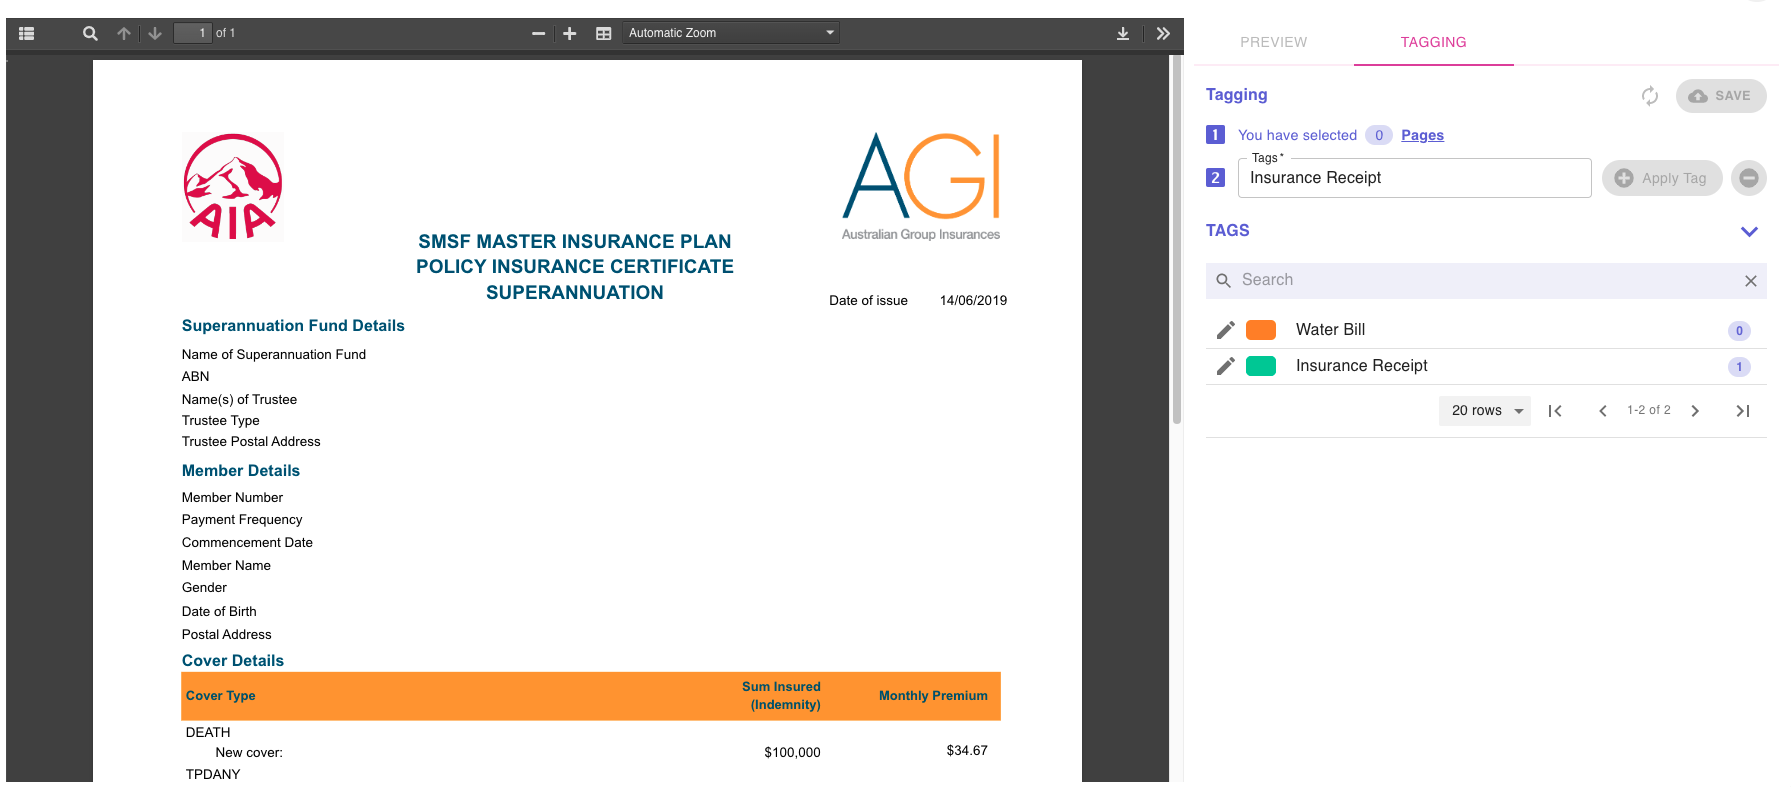
Use the same approach to tag more insurance receipts as well, image in below shows one of tagged insurance receipt. Since there is only one page, the indicator of 'Insurance Receipt' shows 1.
We uploaded and tagged 28 Insurance Receipt and 11 Water Bill documents as shown in the summary section of Labelling. In the next sector, we will demostrate how to train a custom model based on those tagged documents.

Train
With SmartDocs builder, it is very simple to train a custom model. Once user completes the labelling/annotation process, just navigate to the ‘TRAIN’ section and click the ‘START’ button and then fill in Job Name/(Optional) and model size.
Larger model size yields a more complex and powerful model but with longer training time and higher training cost. By default, the model size is ‘Normal’ and we would like to recommend users to start with ‘Normal’ size and switch to a larger size if the training result is unsatisfying.
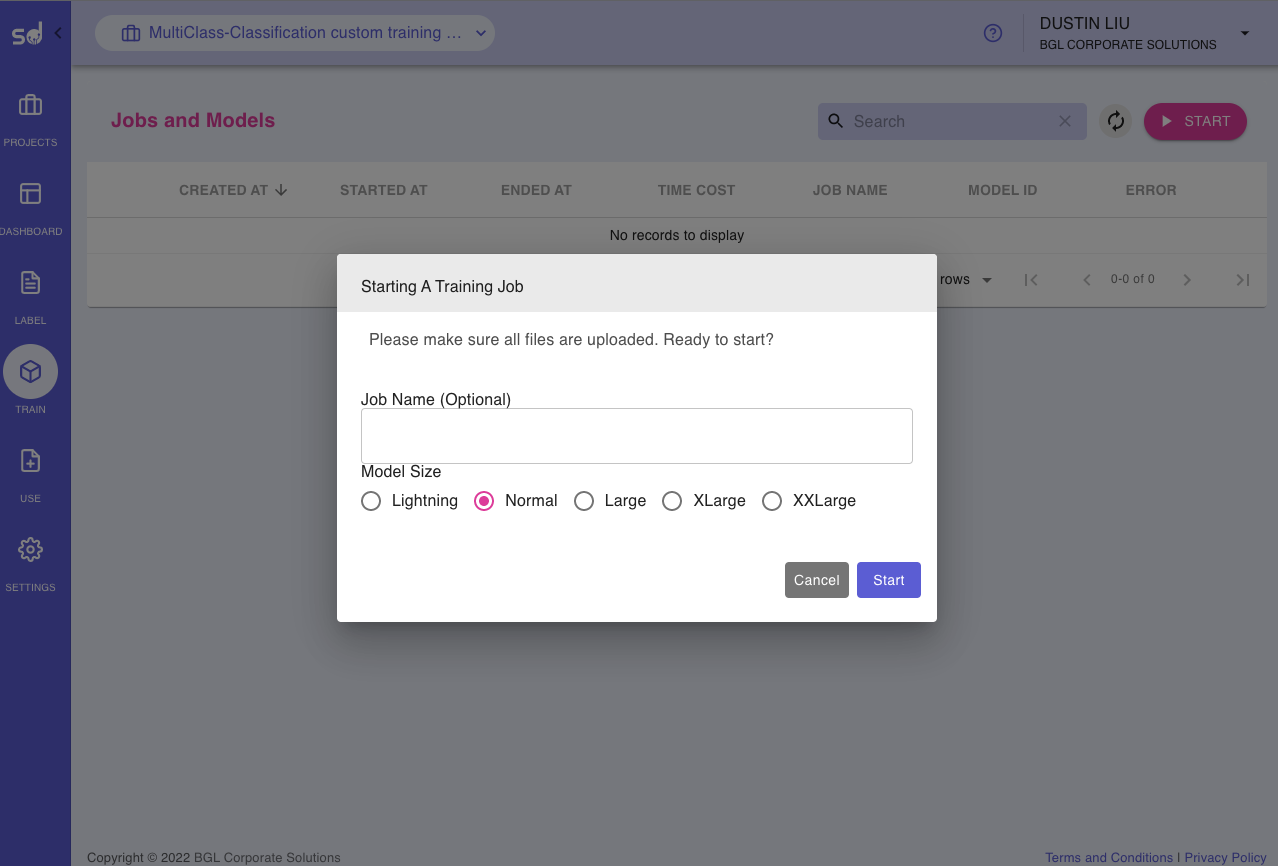
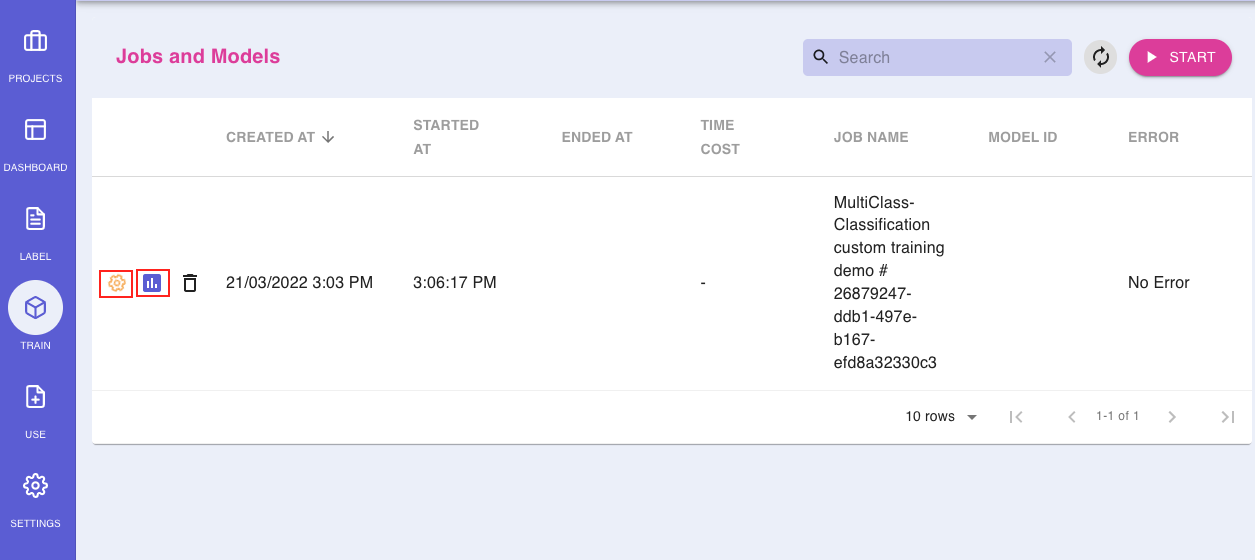
The training job task will be scheduled and put into a pipeline once user clicks on the ‘START’ button as shown in the image above.
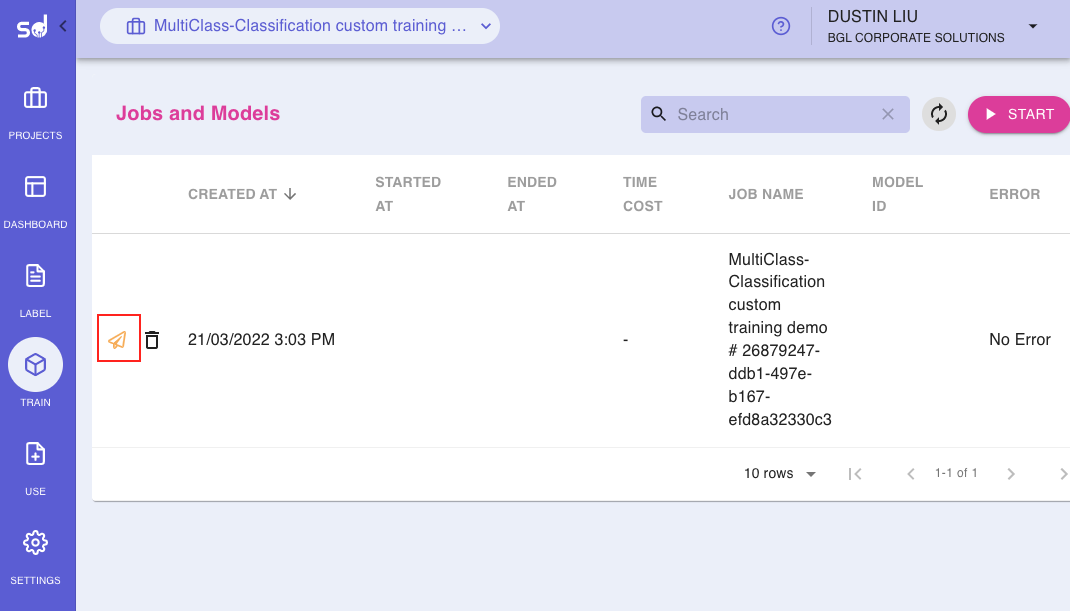
The training job will be initiated once the resource is available and the user will see a spinning Tools icon which indicates that the training is in progress. During the course of training, users can track the progress of training by clicking the progress/report icon.
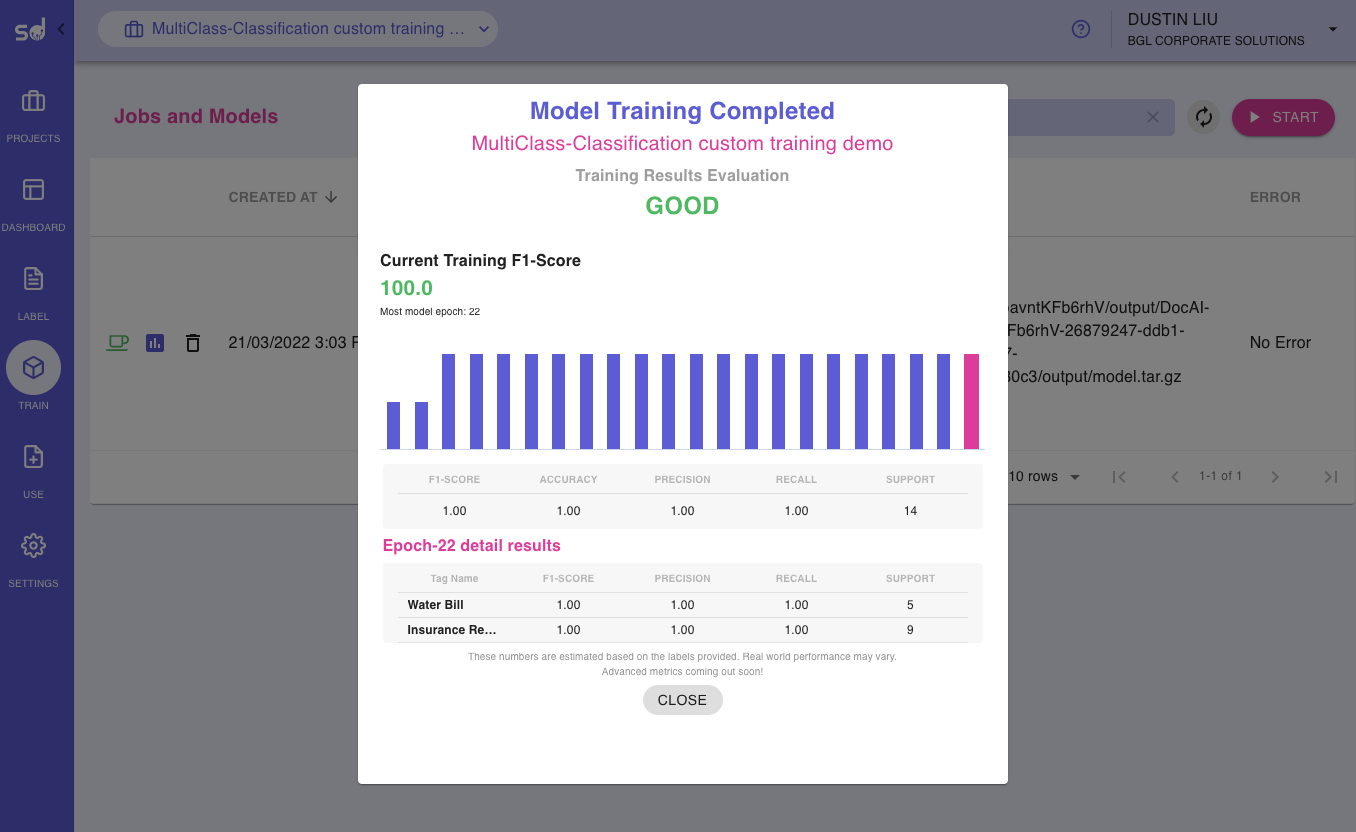
In this demo, 5 pages of Water Bill and 9 pages of Insurance Receipt are used as a test set to evaluate the training results with a total of 22 epochs. The training result is pretty amazing since F1-Score has reached 1.0 from epoch 3.
Once the training is completed, the spinning Tools icon will turn into green and user can find additional information about this training as well such as ‘ENDED AT’ and ‘TIME COST’ which tell when did the training job end and how long did the training job take.

NoteThe model prediction/use will simply pick up and use the latest successfully trained model. Unfortunately, in the current release, SmartDocs Builder doesn’t support selecting/switching between different trained models.
Predict/Use
Once the custom model is trained, user can navigate to 'USE' section to use the model. Simple upload the documents you would like to predict, here we uploaded one insurance receipt, one water bill to demostrate the prediction. A spinning Tools icon indicates that the prediction/data extraction is in progress.

The spinning Tools icon will become a folder icon once the process completes and user can review the result by clicking the documentation.
